
Hydro power 16
The Hydroscreen arrived in good condition along with some additional pieces that I ordered to facilitate the installation, so my focus turned to designing and building a frame to mount the water collection equipment on the steep rock face up the hill.
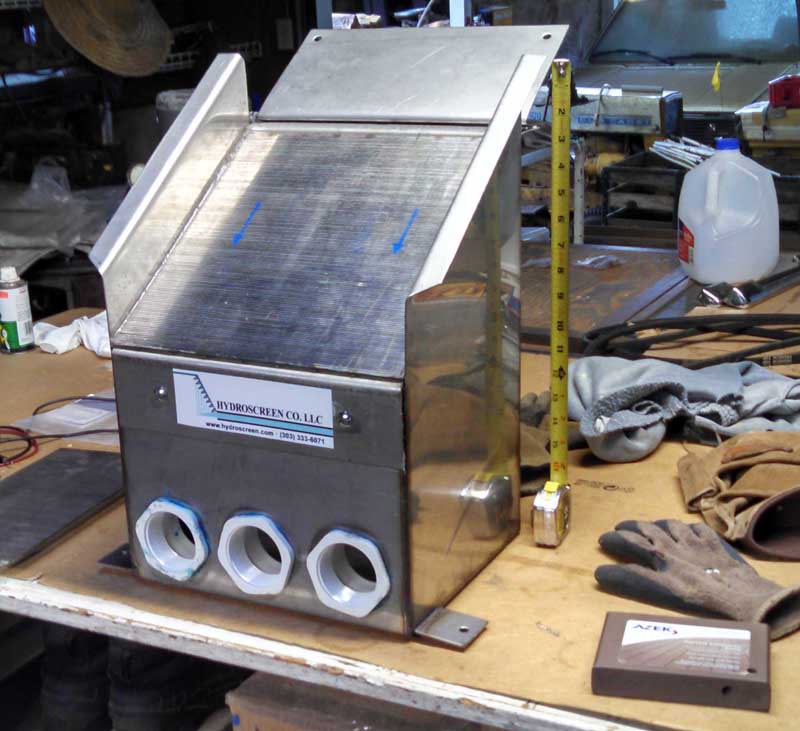
I purchased some Azek decking material to build a frame to support it on the rock face where I would be collecting the water up on the hill. This decking material is pure PVC plastic, so rot was never going to be a problem. Assembly was made with stainless steel decking screws, eliminating rust and corrosion there as well. A two-piece stainless steel ramp was fabricated out of 16-gauge material to speed and smooth the flow of water before it reached the Coanda-effect grating. The entire fabrication was completed and assembled in my garage before being taken up the hill.
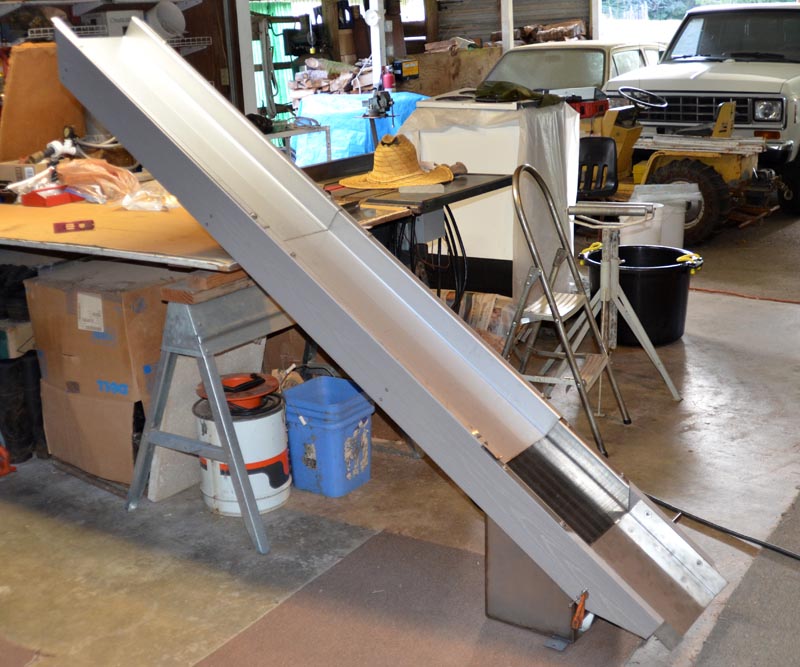
Securing the collection system to the hill was going to be an interesting challenge. the rock face the water flowed down was at about a 45° angle and very uneven. It was obvious that I'd need to be able to adjust the height of the supports as I built them, so stainless threaded rod was chosen as the material, along with stainless wedge anchors, and all stainless hardware, nuts, washers, couplers, etc.
In order to properly set the anchors in the rock, I needed to grind smooth flat spaces around each anchor. This all necessitated use of power tools, so I hauled a small gasoline generator up the hill, along with an electric angle grinder and 1/2" power drill motor, stacking most of it on a pallet cribbed up on a pile of rocks and tree debris.
The screen frame was temporarily supported on surveyors stakes and a plywood cutout of the Hydroscreen collection box profile held to the frame with c-clamps, and adjusted until the frame was at the right height and angle, and level from side-to-side. then measurements were made, the level spot ground into the rock, and the wedge anchor set in a hole drilled into the rock face at the proper angle. For much of this part of the project, I had to suspend my "everything-straight-and-true" work ethic, because there were some odd angles involved, but in the end, the frame was attached just as I wanted it. Here's a shot of that process getting underway:
See that giant old-growth Douglas fir log laying diagonally at the top of the photo? This will become a problem very soon.
With the frame attached to the rock face and the Hydroscreen and ramp system installed, it was time to figure out how to conduct the water flowing from above the site onto the top ramp. I had figured that some sheet metal laid on the rock, perhaps with a lip that went into a groove cut into the rock might suffice. I needed to boost myself above that old log and see what things looked like from above, a "waters-eye view" as it were. As in the many times before that I went up there, I boosted myself up the slippery wet rock by pulling on nearby shrubbery and the big log as an anchor.
This time, for whatever reason, the huge log came loose, and the end started to shift down the hill, rolling on cobbles and stones that were acting like ball bearings. I watched, horrified as the log slowly moved straight for my just-installed frame and screen. It stopped less than three-quarters of an inch from the top of the frame!
Emergency! I quickly completely disassembled the ramps, screen, and frame, moving it all out of the area while I contemplated to do about this. This was a mostly rotted log that was perhaps forty feet long that had collapsed across the ravine probably 150+ years ago. I was much more that I could ever hope to completely cut up and remove in this setting. What I ended up doing after determining that the log had settled enough to work on, was to cut slices off the downhill end that were light enough for me to pick up and carry away. there were mostly 4" or so wide, as the interior of the log wasn't completely rotted. After the first cut, it seemed that the end that was on the rock face had been holding the rest of the log in suspension, and it was now resting on the soil to the side of the site. All of the removed wood had to be carried away from the ravine, as any loose material tended to roll into the center and create obstacles I would be tripping over.
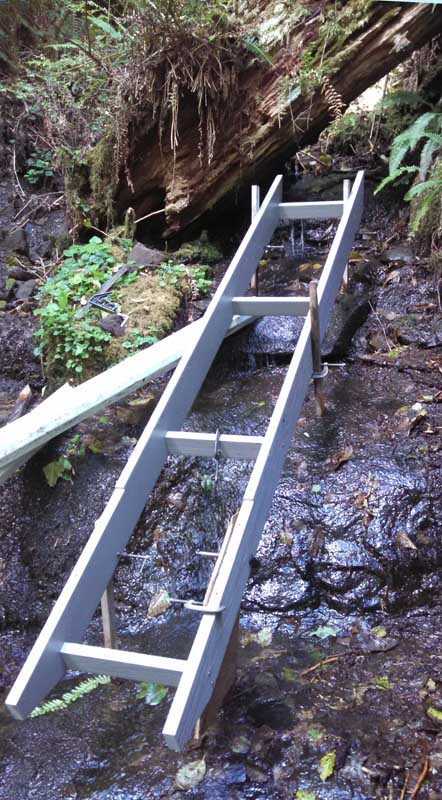
In the end, this actually simplified the rest of the installation, as now I had more direct access to the water, now that it didn't flow around the butt end of the log on the rock face. Somewhere along the way, someone gifted me a four-foot section of 12" PVC sewer pipe that had been cut in half lengthwise, forming a couple of useful troughs. I was able to make a more natural entry for the water by building up the stream bed with native rock and soil, putting the pipe sections in the middle to catch the stream of water above the collection system where it exited a shallow gully before spilling down the rock face.
This turned out to be a very effective method that didn't require any concrete or other extreme measures to catch nearly all of the water. Only a small, pencil-thin trickle escaped the troughs, which directed the water to the top of the ramp feeding the Hydroscreen.
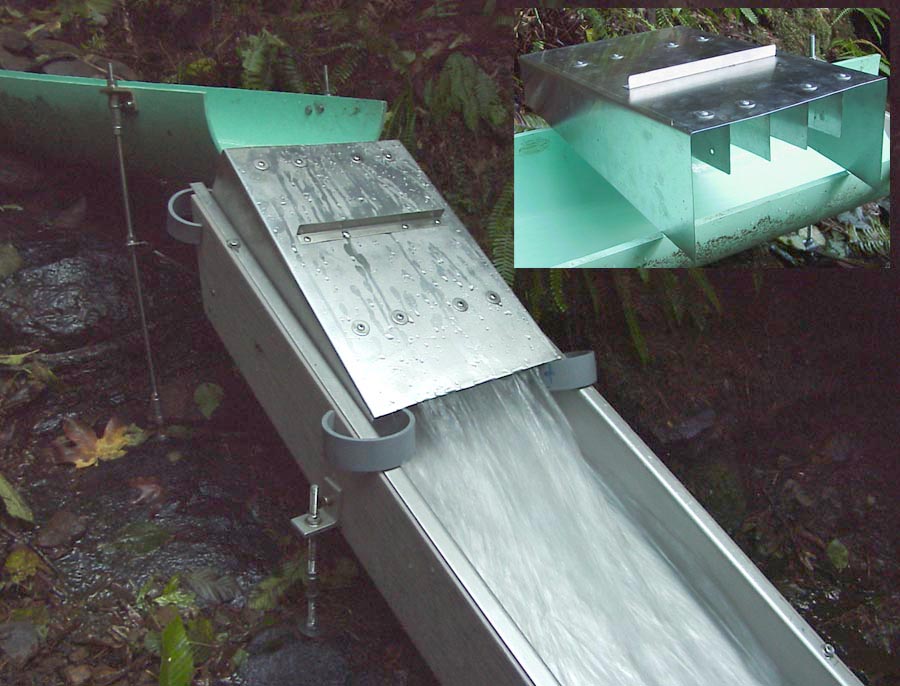
One small problem presented itself: because I had aligned the ramp system to the water that had been running around the bottom of the now-gone log butt, the flow coming off the second trough was at an angle to the trough, and about 30% of the flow was skipping off the ramp and over the side, effecively being wasted.
A little brain power, some sections of stainless sheet from the front of an old refrigerator and some pop rivets, and I had a hood to redirect the water and straighten it to the direction of the ramp. The inset shows the internal fins that help make the water behave.
With these final adjustments, the water collection system was complete enough to connect the old 3/4" pipe leading to the house, and provide a reliable supply of essential liquid-of-life. In fact, the new system worked so well that it nearly eliminated the too-often trips up the hill to see why the water had quit, usually at the worst possible time. With self-cleaning action, and effective filtering of particles and debris down to .5mm in size, trips to the water collection system became a seasonal occurrence, rather than a two-to-three times a week annoyance.
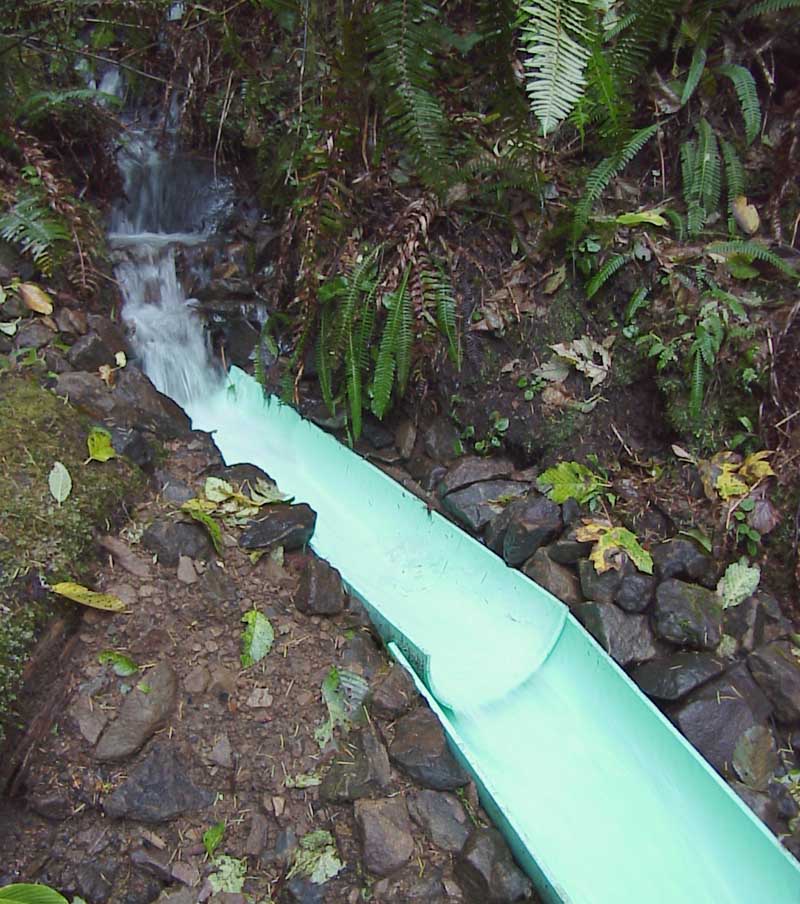
Here's the completed collection system in action just after the first major storm of the Fall season that year:
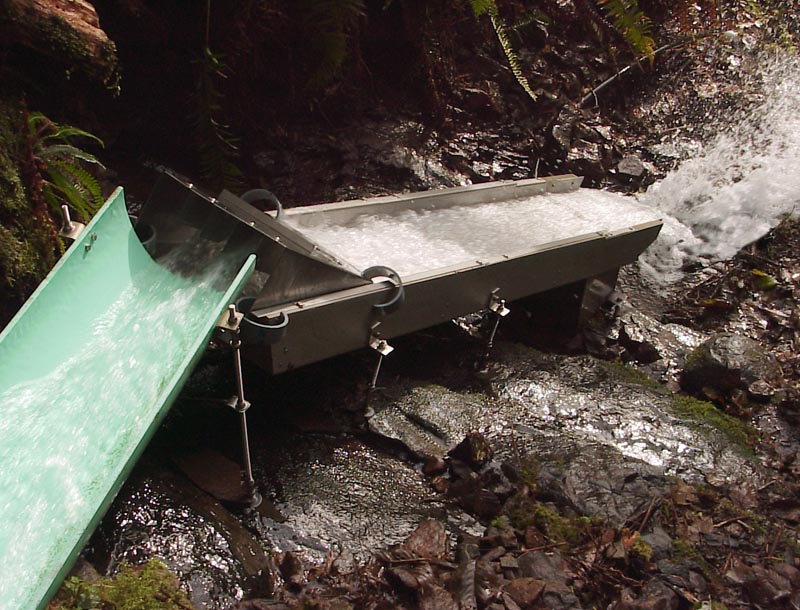
That night, I laid in bed listening to the rain hammer the roof, wondering how the rocks and soil that I placed at the head of the troughs and ramp were surviving the onslaught. The next morning, a trip up the hill confirmed that everything was still in place and not damaged by the very large flow of runoff that it had endured all night long. It looked like I had a winner!
Original material ©1996-2026 Mr. Sharkey | All rights reserved